Mar 01, 2023

Author(s)


This is the second entry in our AWS-centric blog series leading up to the AWS Startup Showcase on Thursday, March 9th. We are excited to be a part of this event with other selected visionary AI startups to talk about the future of deploying AI into production at scale. Sign up here to register for this free virtual event, hosted by AWS and SiliconANGLE.
Inference costs, accuracy, and latency are all critical factors when deploying natural language processing (NLP) and computer vision models for real or near-time inference. However, accurate models tend to be large models, and running large models at low latency typically requires expensive hardware. DeepSparse provides GPU-class performance on CPUs, so you can deploy accurate models at best-in-class speeds on affordable CPU instances on AWS.
We previously showed you how easy it is to get your own DeepSparse runtime deployed via the AWS Marketplace. In this blog, we will dive deeper into different deployable models, different deployment types, benchmarking, and even monitoring options within DeepSparse. These features allow you to build production-quality ML pipelines directly from the AWS Marketplace at low cost.
Let’s start with natural language processing.
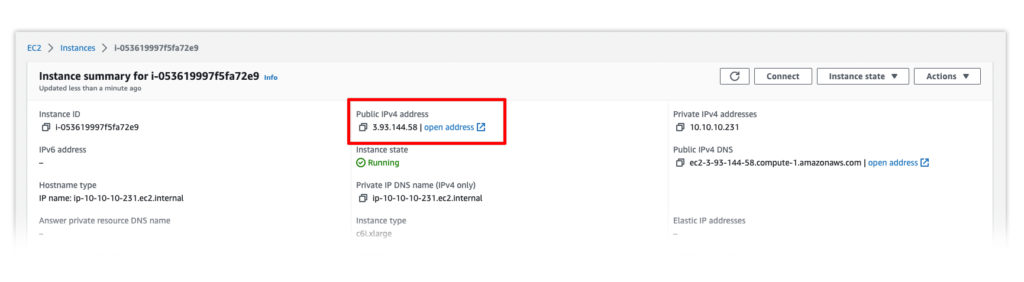
SSH into your DeepSparse Runtime Inference EC2 Instance
Start by logging in to your EC2 instance using your public IP address and SSH key. Click the instance ID on EC2 to find your public IP address.
ssh -i "sshkey.pem" user@YOUR_IP_ADDRESSDeploy an NLP Model from SparseZoo Using DeepSparse Pipeline
Now let’s demonstrate how to deploy a sentiment analysis model from SparseZoo using DeepSparse. SparseZoo is an open-source model repository for sparse and sparse-quantized models. Sparsification and quantization are powerful techniques for optimizing models for inference, reducing the computation needed to deploy while maintaining the model’s accuracy.
DeepSparse sentiment analysis pipelines integrate with Hugging Face’s Transformers library, giving access to smaller yet accurate versions of state-of-the-art NLP models. The sentiment analysis pipeline has pre-trained models and pre-processing, enabling you to pass raw text to the model.
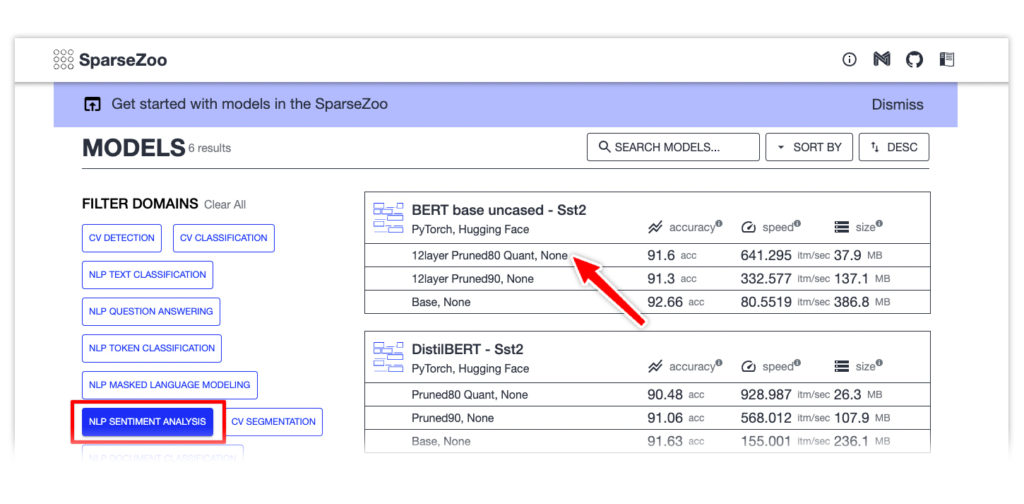
Go to SparseZoo, filter by sentiment analysis models, and for this exercise, select the quantized BERT base uncased model trained on the SST2 dataset.
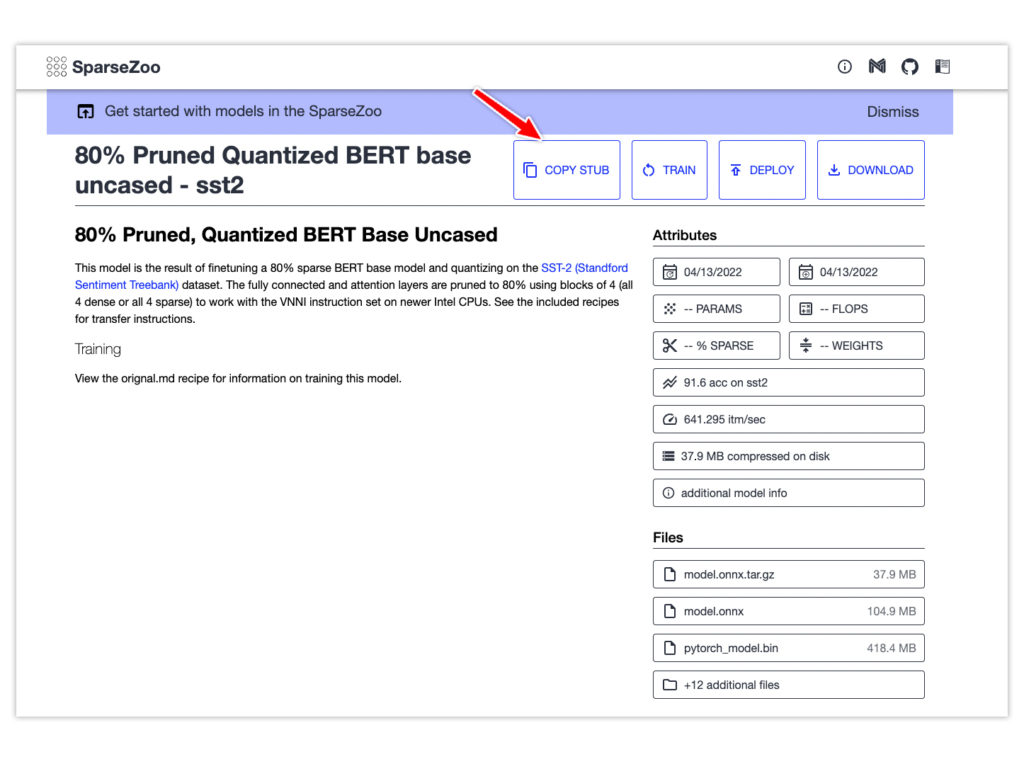
Click the model for more information. Use the Copy Stub button to copy the model's path for use in the next part.
Here’s the code snippet for deploying and running inference on a sentiment analysis model with the DeepSparse Inference Runtime. Paste the model stub copied above as the model_path.
from deepsparse import Pipeline
task = "sentiment-analysis"
sparse_qa_pipeline = Pipeline.create(task=task,model_path="zoo:nlp/sentiment_analysis/bert-base/pytorch/huggingface/sst2/12layer_pruned80_quant-none-vnni")
text = "kept wishing I was watching a documentary about the wartime Navajos and what they accomplished instead of all this specious Hollywood"
sparse_output = sparse_qa_pipeline(text)
print(sparse_output)
labels=['LABEL_0'] scores=[0.9995901584625244]
Deploy an NLP Model from SparseZoo With the DeepSparse Server
The alternative is to deploy the sentiment analysis pipeline using the DeepSparse Server. The server is built on top of Fast API, enabling you to generate endpoints in minutes.
Use a YAML file to configure the server. The file requires the type of task and the path to the model. Save the configuration below in a file named sa_server_config.yaml.
loggers:
  python:

endpoints:
  - task: sentiment-analysis
    model: zoo:nlp/sentiment_analysis/bert-base/pytorch/huggingface/sst2/12layer_pruned80_quant-none-vnni
Next, start the DeepSparse Server using this YAML file. Run deepsparse.server --help for full usage.
deepsparse.server --config-file sa_server_config.yamlThe above command starts a server at port 5543. Visit http://YOUR_INSTANCE_IP:5543/docs to view the deployed model’s documentation. Notice /predict is among the exposed endpoints. Use that endpoint to send requests to the model.
import requests

# fill in your IP address
ip_address = "YOUR_INSTANCE_PUBLIC_IP" # (e.g. 54.160.40.19)
endpoint_url = f"http://{ip_address}:5543/predict"

# question answering request
obj = {"sequences": "kept wishing I was watching a documentary about the wartime Navajos and what they accomplished instead of all this specious Hollywood"}

# send HTTP request
response = requests.post(endpoint_url, json=obj)
print(response.text)

# >> {"labels":["LABEL_0"],"scores":[0.9954294562339783]}
Benchmark an NLP Model with DeepSparse Inference Runtime
DeepSparse ships with a benchmarking script to assess the performance of various NLP models. Let’s use this script to look at the throughput of the sentiment analysis model you’ve just deployed.
On an AWS c6i.4xlarge instance, DeepSparse achieves more than 230 sequences per second at batch 64.
deepsparse.benchmark
zoo:nlp/sentiment_analysis/bert-base/pytorch/huggingface/sst2/12layer_pruned80_quant-none-vnni -i [64,128] -b 64 -nstreams 1 -s sync
# Original Model Path:
zoo:nlp/sentiment_analysis/bert-base/pytorch/huggingface/sst2/12layer_pruned80_quant-none-vnni
#  Batch Size: 64
# Scenario: sync
# Throughput (items/sec):  232.4853
Deploying Other NLP Models on AWS Using DeepSparse Inference Runtime
You can deploy other natural language processing models on AWS, using DeepSparse Inference Runtime, like:
- Token classification
- Question answering
- Document classification
- Masked language modeling
Here’s an example of deploying a named-entity recognition model using DeepSparse Pipelines.
from deepsparse import Pipeline
task = "ner"
sparse_qa_pipeline = Pipeline.create(
        task=task,
        model_path="zoo:nlp/token_classification/bert-base/pytorch/huggingface/conll2003/12layer_pruned80_quant-none-vnni",
    )
text = "We are flying from Texas to California"
sparse_output = sparse_qa_pipeline(text)
print(sparse_output)
You can deploy the same model using the DeepSparse Server by setting up a YAML configuration file named ner_server_config.yaml.
loggers:
  python:

endpoints:
  - task: sentiment-analysis
    model: zoo:nlp/token_classification/bert-base/pytorch/huggingface/conll2003/12layer_pruned80_quant-none-vnni
Use this configuration file to start the DeepSparse Server.
deepsparse.server --config-file ner_server_config.yamlDeploy a Computer Vision Model from SparseZoo Using DeepSparse Pipeline
DeepSparse provides computer vision pipelines you can immediately deploy and use for inference. Using DeepSparse Pipelines and computer vision models from SparseZoo guarantees fast inference and high throughput.
Let’s demonstrate how to deploy a YOLOv5 object detection using the DeepSparse Inference Runtime. The steps are:
- Download the annotation script
- Download a sample image
- Initialize a DeepSparse YOLO Pipeline
- Run inference on the image
- Annotate the image using the annotation script
- Convert the annotation to an image using Pillow
curl https://raw.githubusercontent.com/neuralmagic/deepsparse/main/src/deepsparse/yolo/utils/utils.py > annotate.py

curl  https://raw.githubusercontent.com/neuralmagic/deepsparse/main/src/deepsparse/yolo/sample_images/basilica.jpg > basilica.jpg
from deepsparse import Pipeline
from annotate import *
task = "yolo"
sparse_pipeline = Pipeline.create(
task=task,
model_path="zoo:cv/detection/yolov5-l/pytorch/ultralytics/coco/pruned_quant-aggressive_95",
class_names='coco', # if using custom model, pass in a list of classes the model will classify or a path to a json file containing them
model_config=None, # if using custom model, pass in the path to a local model config file here
)
images = ["basilica.jpg"]
sparse_output = sparse_pipeline(images=images, confidence_threshold=0.2, nms_threshold=0.5)
sparse_annotation = annotate_image(image=images, prediction=sparse_output)
sparse_result = Image.fromarray(sparse_annotation)Deploy a Computer Vision Model from SparseZoo with the DeepSparse Server
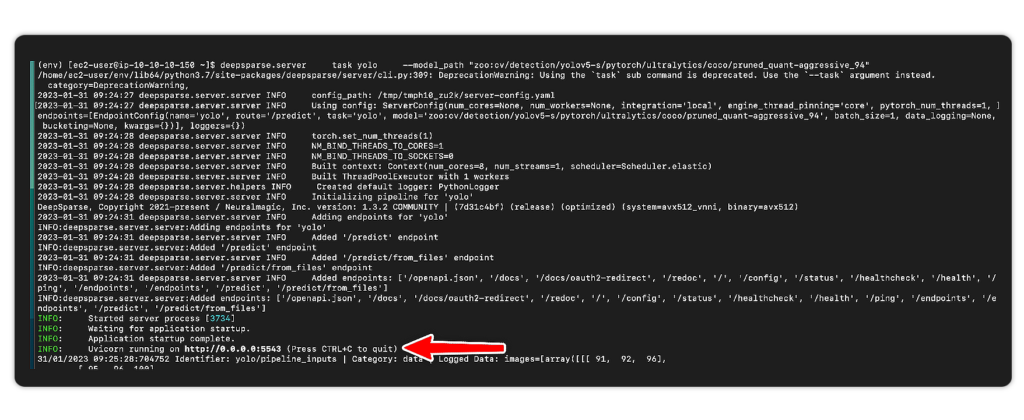
Similar to the NLP models, you can deploy computer vision models using the DeepSparse Server. Spin up the YOLOv5 server using deepsparse.server while defining the task type as yolo.
deepsparse.server \
    task yolo \
    --model_path "zoo:cv/detection/yolov5-s/pytorch/ultralytics/coco/pruned_quant-aggressive_94"
After running the above command, the server will be available for inference at port 5543.
To run inference, send requests to YOUR_PUBLIC_IP_ADDRESS/predict/from_files.
import requests
import json

url = 'YOUR_PUBLIC_IP_ADDRESS:5543/predict/from_files'
path = ['basilica.jpg'] # list of images for inference
files = [('request', open(img, 'rb')) for img in path]
resp = requests.post(url=url, files=files)
annotations = json.loads(resp.text) # dictionary of annotation results
bounding_boxes = annotations["boxes"]
labels = annotations["labels"]
Benchmark a Computer Vision Model with DeepSparse Inference Runtime
On an AWS c6i.4xlarge instance, DeepSparse YOLO pipeline achieves more than 85 items per second at batch 1.
deepsparse.benchmark \
  zoo:cv/detection/yolov5-s/pytorch/ultralytics/coco/pruned_quant-aggressive_94 \
    --scenario sync

Batch Size: 1
Scenario: sync
Throughput (items/sec): 89.5859
Deploying Multiple Models with DeepSparse Inference Runtime
The DeepSparse Inference Runtime supports deploying multiple models on the same CPU without performance degradation. Hosting multiple models on the same CPU reduces deployment costs and increases inference speed because the models share the same resources. Deploying multiple models on the same CPU is ideal when you need to access models simultaneously. Sparsification also leads to smaller models, so you can fit more sparse models, versus dense models, on the same CPU.
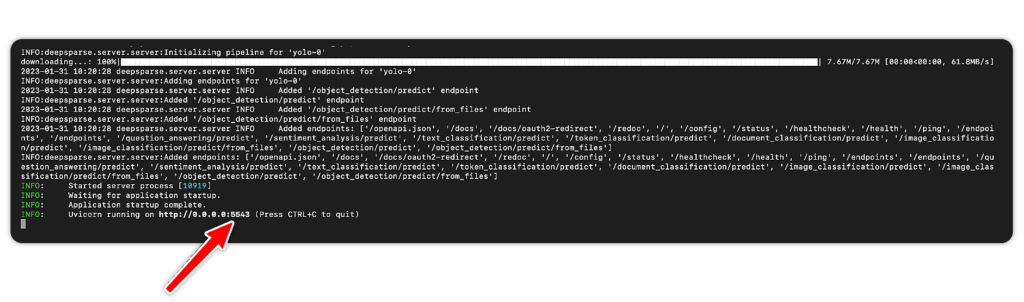
Let’s demonstrate how to deploy multiple models on the same CPU by hosting several NLP and computer vision models on the same EC2 instance. Create a YAML file name config.yaml with all models' configurations.
endpoints:
    - task: question_answering
      route: /question_answering/predict
      model: zoo:nlp/question_answering/bert-base/pytorch/huggingface/squad/pruned95_obs_quant-none
    - task: sentiment_analysis
      route: /sentiment_analysis/predict
      model: zoo:nlp/sentiment_analysis/obert-base/pytorch/huggingface/sst2/pruned90_quant-none
    - task: text_classification
      route: /text_classification/predict
      model: zoo:nlp/text_classification/distilbert-none/pytorch/huggingface/mnli/pruned80_quant-none-vnni
    - task: token_classification
      route: /token_classification/predict
      model: zoo:nlp/token_classification/obert-base/pytorch/huggingface/conll2003/pruned90_quant-none
    - task: text_classification
      route: /document_classification/predict
      model: zoo:nlp/document_classification/obert-base/pytorch/huggingface/imdb/pruned90_quant-none
    - task: image_classification
      route: /image_classification/predict
      model: zoo:cv/classification/resnet_v1-50/pytorch/sparseml/imagenet/pruned85_quant-none-vnni
    - task: yolo
      route: /object_detection/predict
      model: zoo:cv/detection/yolov5-s/pytorch/ultralytics/coco/pruned_quant-aggressive_94
Use this to start the server:
deepsparse.server --config_file config.yamlThe endpoints are now ready to receive requests on port 5543.
Here is an example of running inference on the YOLO object detection endpoint.
import requests
import json

url = 'YOUR_PUBLIC_IP_ADDRESS:5543/object_detection/predict/from_files'
path = ['basilica.jpg'] # list of images for inference
files = [('request', open(img, 'rb')) for img in path]
resp = requests.post(url=url, files=files)
annotations = json.loads(resp.text) # dictionary of annotation results
bounding_boxes = annotations["boxes"]
labels = annotations["labels"]
labels
# [['2.0', '3.0', '0.0', '2.0', '2.0', '0.0', '9.0', '3.0', '0.0', '0.0', '0.0', '0.0', '0.0', '0.0', '2.0', '0.0', '2.0']]
Prometheus Logging with DeepSparse Inference Runtime
You can monitor the health of your deployment with DeepSparse logging. You can oversee factors like latency and throughput of queries and model accuracy. You can also track system metrics such as total processing time and data logging metrics such as pipeline inputs and outputs.
Logging is configured in the model’s configuration file. Let’s demonstrate this using an image classification pipeline with Prometheus logging.
Clone the Prometheus example to follow along. You’ll need to install Docker and Docker Compose to run this example.
git clone https://github.com/neuralmagic/deepsparse.git
cd deepsparse
git checkout rs/logging-example
cd examples/logging-prometheus/
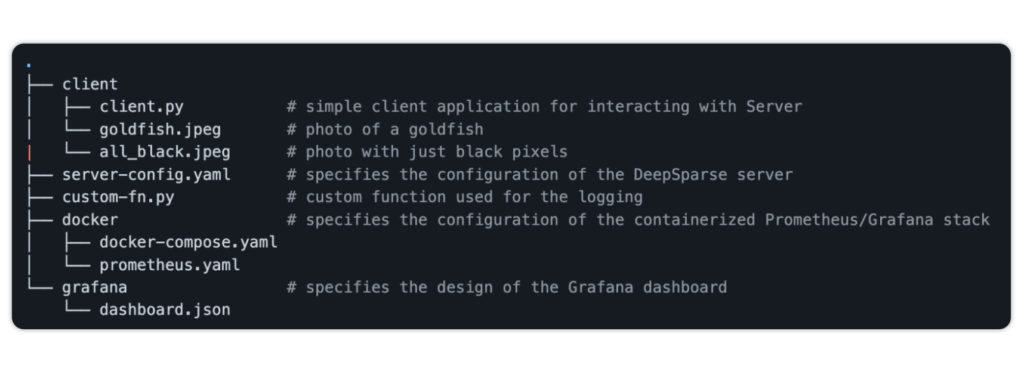
The project contains the following files:
client.pyfor interacting with the DeepSparse Server- photo of a goldfish and an image with black pixels
server-config.yamlto configure an image classification pipelinecustom-fn.pyfor loggingprometheus.yamlconfiguration filedashboard.jsonto configure a Grafana dashboard
Pass the custom function to server-config.yaml to log the mean pixel of the red channel. The server also logs the percentage of pixels that are 0 for each image sent.
loggers:
  prometheus:     # logs to prometheus on port 6100
    port: 6100

endpoints:
  - task: image_classification
    route: /image_classification/predict
    model: zoo:cv/classification/resnet_v1-50/pytorch/sparseml/imagenet/pruned95_quant-none
    data_logging:
      pipeline_inputs.images[0]: # applies to the first image (of the form stage.property[idx])
        - func: fraction_zeros   # built-in function
          frequency: 1
          target_loggers:
            - prometheus
        - func: custom-fn.py:mean_pixel_red # custom function
          frequency: 1
          target_loggers:
            - prometheus
Start the server:
deepsparse.server --config_file server-config.yamlThe next step is to set up Prometheus to monitor the DeepSparse image classification server. The docker-compose.yaml spins up a containerized Prometheus/Grafana stack.
# docker-compose.yaml

version: "3"

services:
  prometheus:
    image: prom/prometheus
    extra_hosts:
      - "host.docker.internal:host-gateway"     # allow a direct connection from container to the local machine
    ports:
      - "9090:9090" # the default port used by Prometheus
    volumes:
      - ${PWD}/prometheus.yaml:/etc/prometheus/prometheus.yml # mount Prometheus config file

  grafana:
    image: grafana/grafana:latest
    depends_on:
      - prometheus
    ports:
      - "3000:3000" # the default port used by Grafana
The Prometheus configuration file:
# prometheus.yaml

global:
  scrape_interval: 15s                      # how often to scrape from endpoint
  evaluation_interval: 30s                  # time between each evaluation of Prometheus' alerting rules

scrape_configs:
  - job_name: prometheus_logs               # your project name
    static_configs:
      - targets:
          - 'host.docker.internal:6100'     # should match the port exposed by the PrometheusLogger in the DeepSparse Server config file
Spin up the Prometheus stack:
cd docker
docker-compose up
Next, execute client.py to run inference.
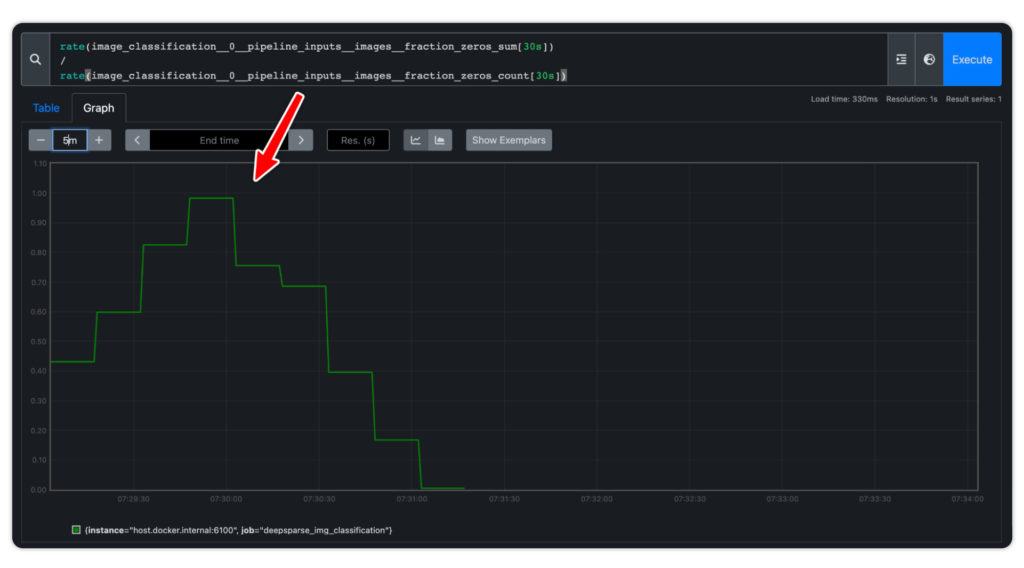
python client/client.pyVisit YOUR_IP_ADDRESS:9090/graph to use Prometheus's native graphing functionality. Add the following expression:
rate(image_classification__0__pipeline_inputs__images__fraction_zeros_sum[30s])
/
rate(image_classification__0__pipeline_inputs__images__fraction_zeros_count[30s])
The expression results in a graph that shows the percentage of 0-pixel images sent to the server. There is a spike in the graph as the black images are sent to the server, indicating an anomaly that requires attention.
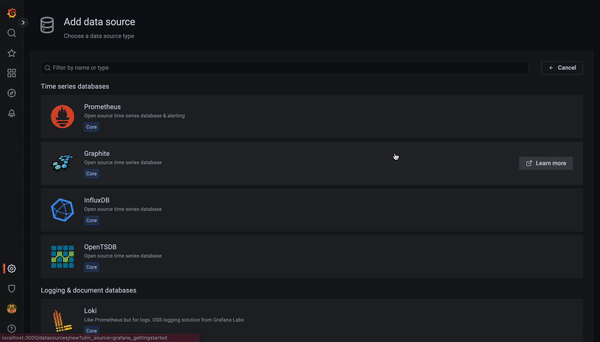
You can also use the Prometheus logs to create a dashboard in Grafana. Head over to YOUR_IP_ADRRSS:3000, log in with admin as the username and password, and add Prometheus as a data source.
Check the IP address of Prometheus because Grafana and Prometheus are running on separate containers.

docker inspect -f '{{range.NetworkSettings.Networks}}{{.IPAddress}}{{end}}' YOUR_CONTAINERS_NAME
# 172.18.0.2
Next, import a dashboard using the provided grafana/dashboard.json.
Final Thoughts
As mentioned at the beginning of this blog, inference costs, accuracy, and latency are all critical aspects of deploying ML solutions into production. DeepSparse provides GPU-class performance on commodity CPU hardware, as well as extensive features for deployment, benchmarking, and monitoring.
All of these features are available for you to try today via the DeepSparse Inference Runtime on the AWS Marketplace. Please join us on Slack to get any of your questions answered, or you can submit an issue on GitHub.