May 24, 2023
Author(s)
Neural Magic's DeepSparse Inference Runtime can now be deployed directly from the Google Cloud Marketplace. DeepSparse supports various machine types on Google Cloud, so you can quickly deploy the infrastructure that works best for your use case, based on cost and performance. In this blog post, we will illustrate how easy it is to get started.
Deploying deep learning models on the cloud requires infrastructure expertise. Infrastructure decisions must take into account scalability, latency, security, cost and maintenance in the context of the machine learning (ML) solution to be delivered. These decisions take time to deliberate and can delay your ability to deploy and iterate on your ML model. You can now deploy deep learning models with the click of a few buttons with DeepSparse Inference Runtime on the Google Cloud Marketplace, so you can deploy your use case quickly and achieve GPU-class performance on commodity CPUs.
Here's how you can get started:
Step 1: Launch DeepSparse Inference Runtime on Google Cloud
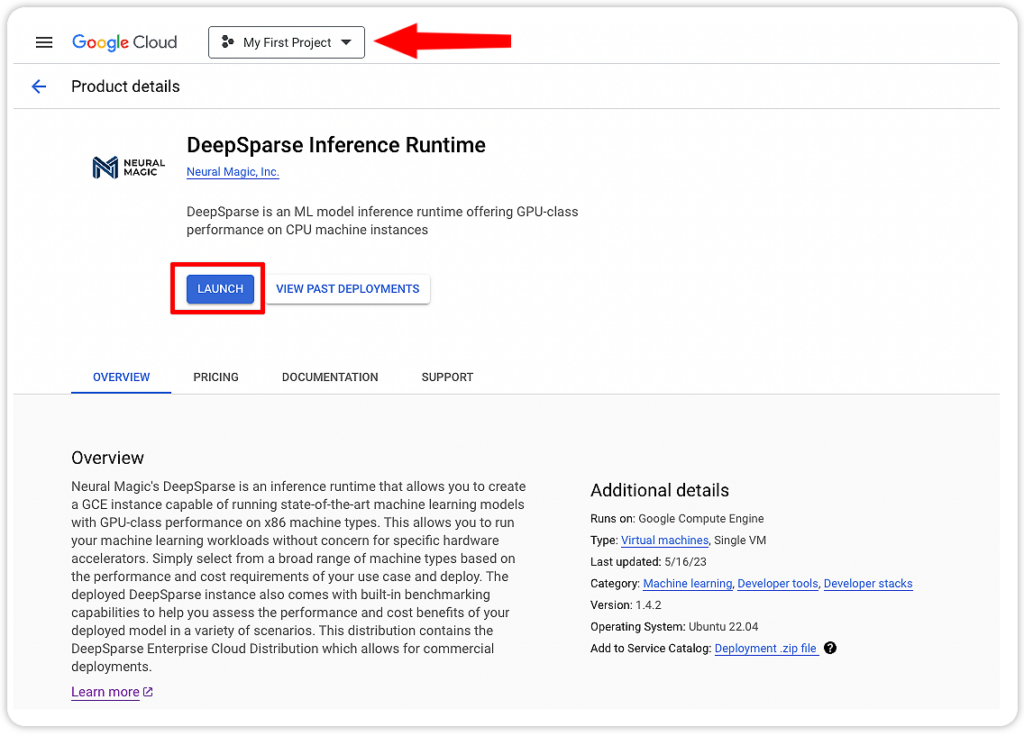
Select a project and Launch DeepSparse Inference Runtime on Google Cloud.
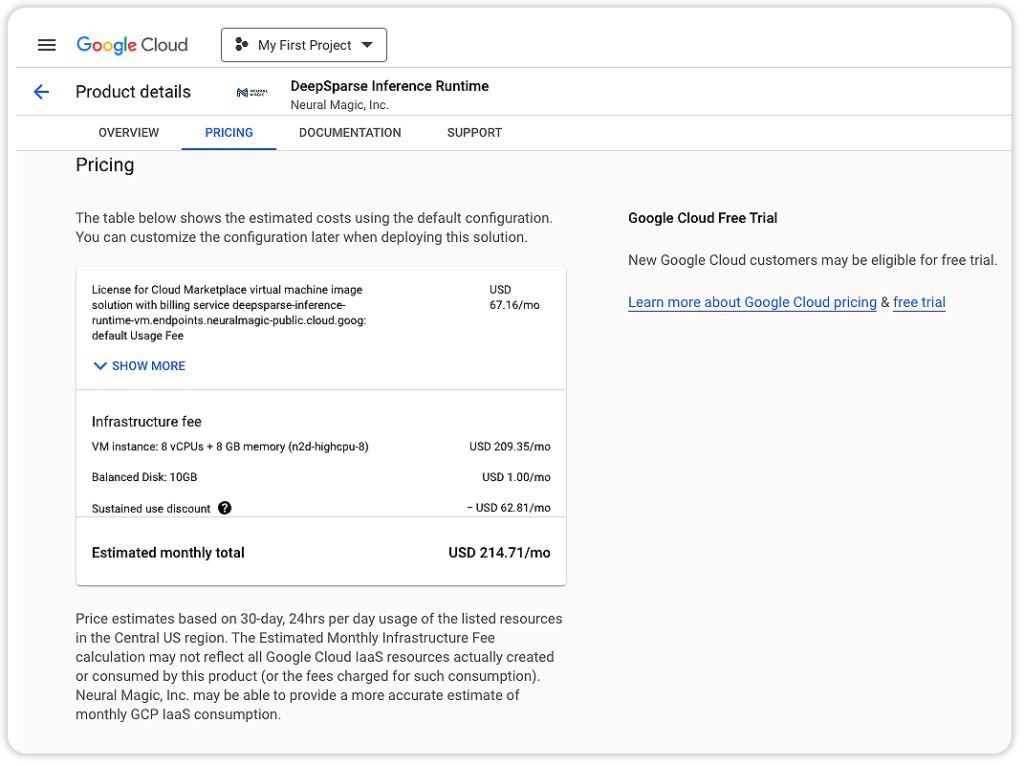
Click the Pricing tab to learn more about pricing, using the default configuration. You can try DeepSparse Inference Runtime for free on Google Cloud with a free trial account. Pending your approval, you will only be charged when you have exhausted your free credits.
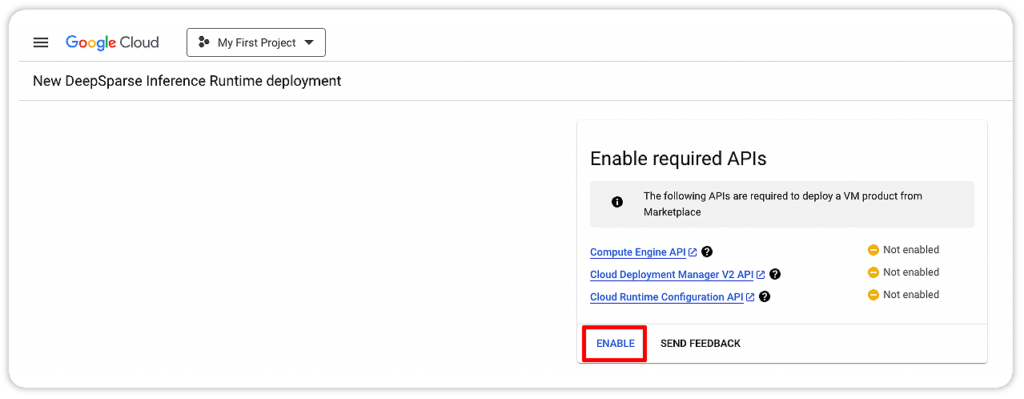
Step 2: Enable Required APIs
After you click Launch, you will land on a page where you can enable any required APIs you don't already have enabled on your Google Cloud account.
Step 3: Configure Your DeepSparse Runtime
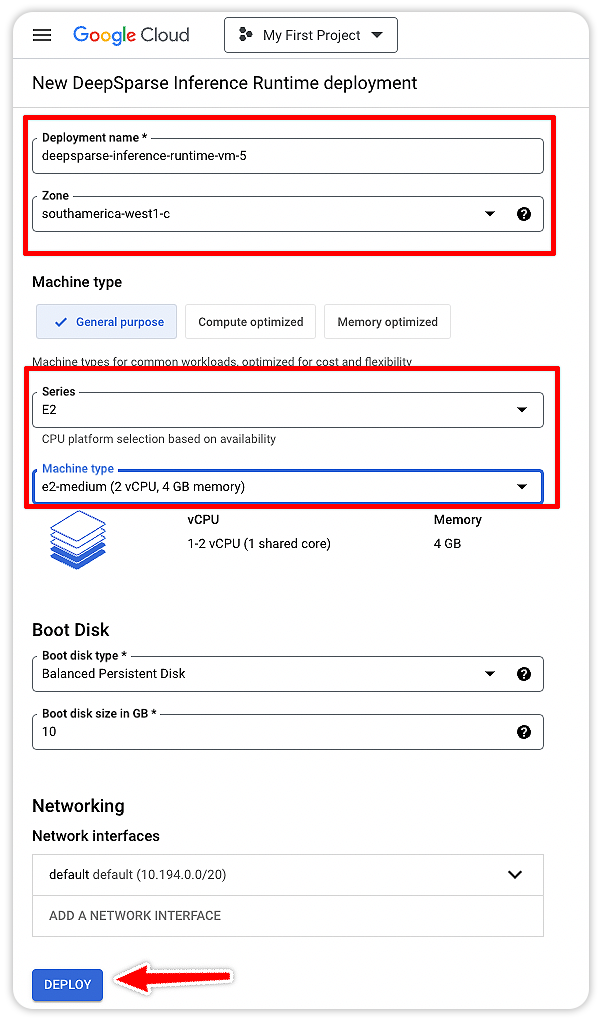
Once all required APIs have been enabled, you will be directed to a page where you can configure DeepSparse Runtime. On this page, complete the following fields:
- Deployment name
- Zone
- Machine type
- Boot disk type and size
- Network interfaces
Now, click Deploy to start the DeepSparse deployment process on Google Cloud.
Step 4: SSH Into the VM
You have now deployed a DeepSparse Inference Runtime instance on Google Cloud. You can now SSH into that instance to start interacting with it.
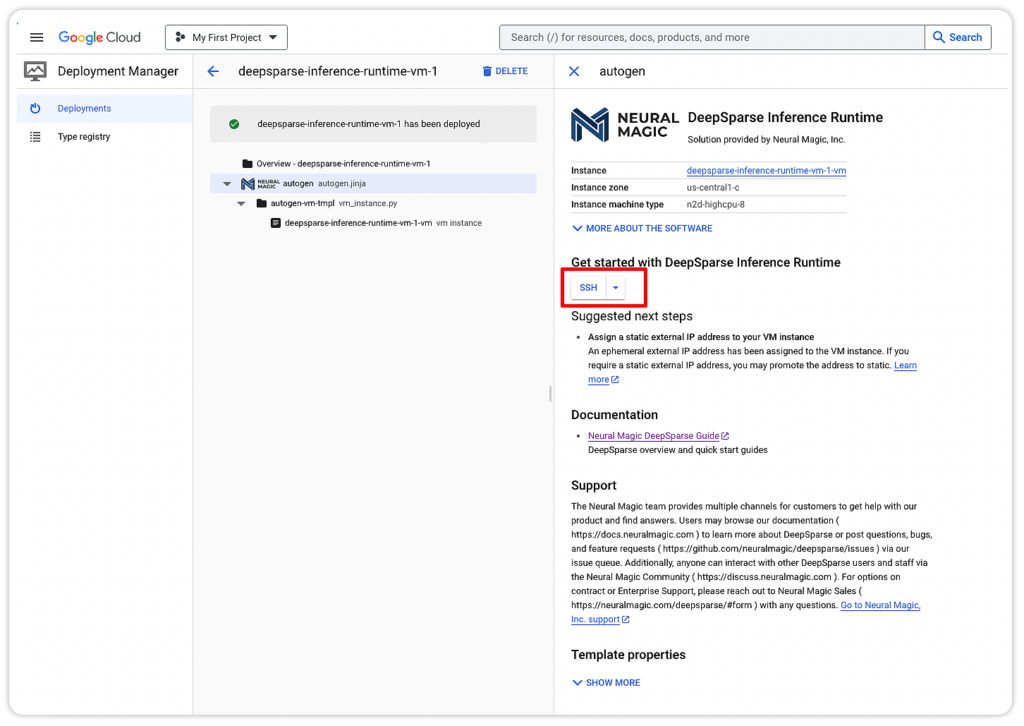
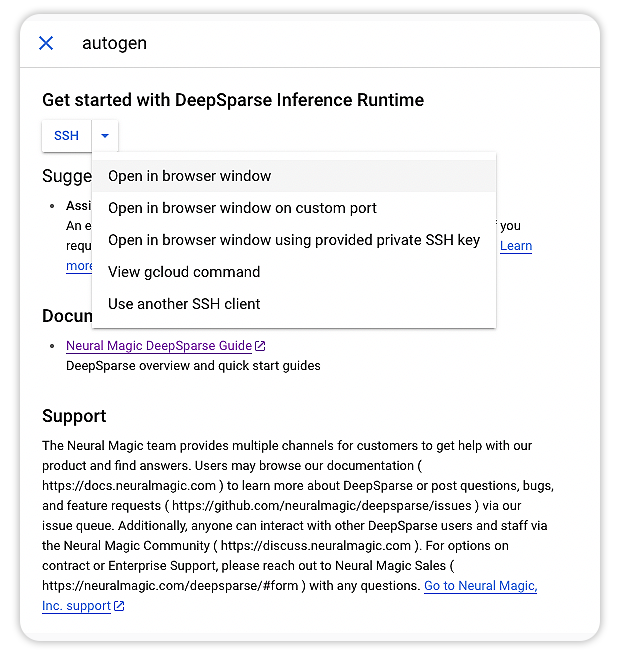
Select one of the SSH options, to begin using it.
Alternatively, you can add your computer SSH key to the virtual machine, to log in with it.
ssh YOUR_USERNAME@YOUR_IP_ADDRRESS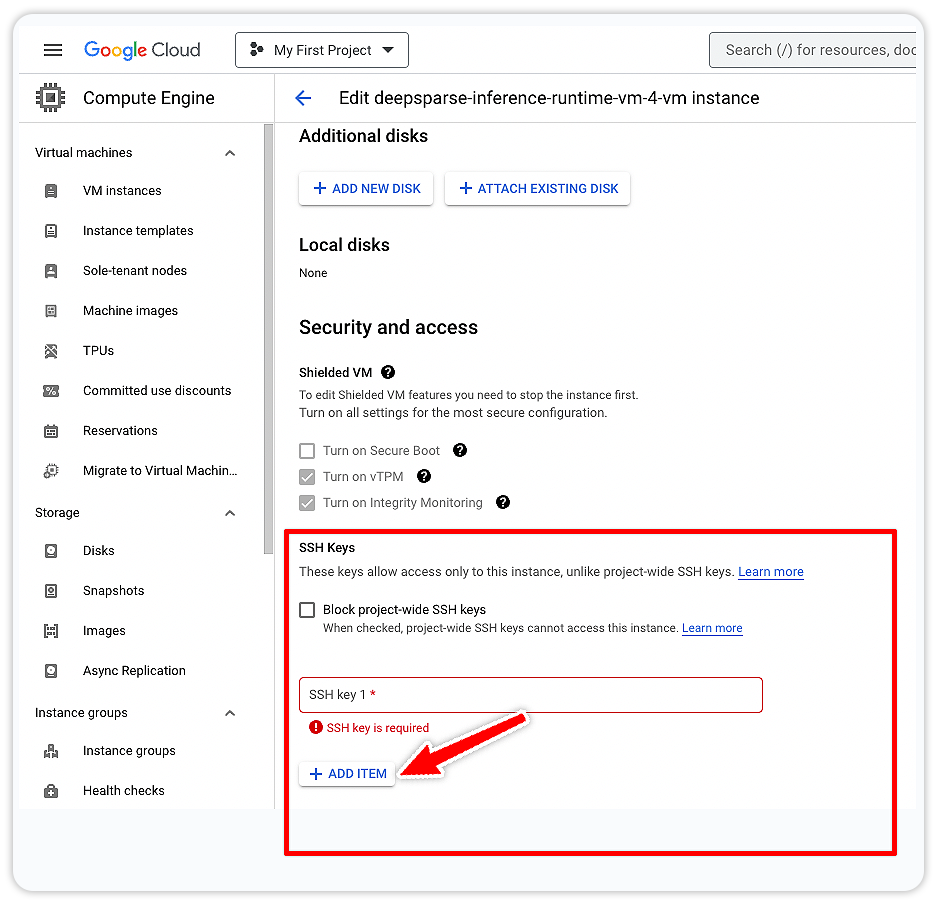
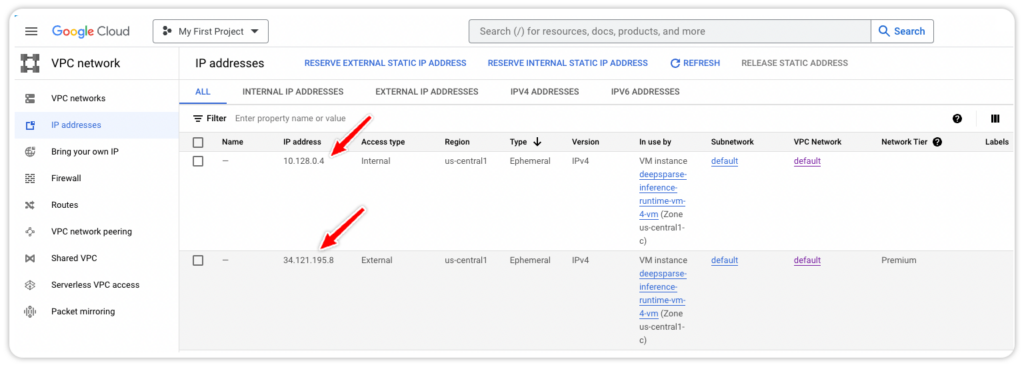
You can find your IP address on the VPC Network panel.
Step 5: Benchmark a Deep Learning Model with DeepSparse
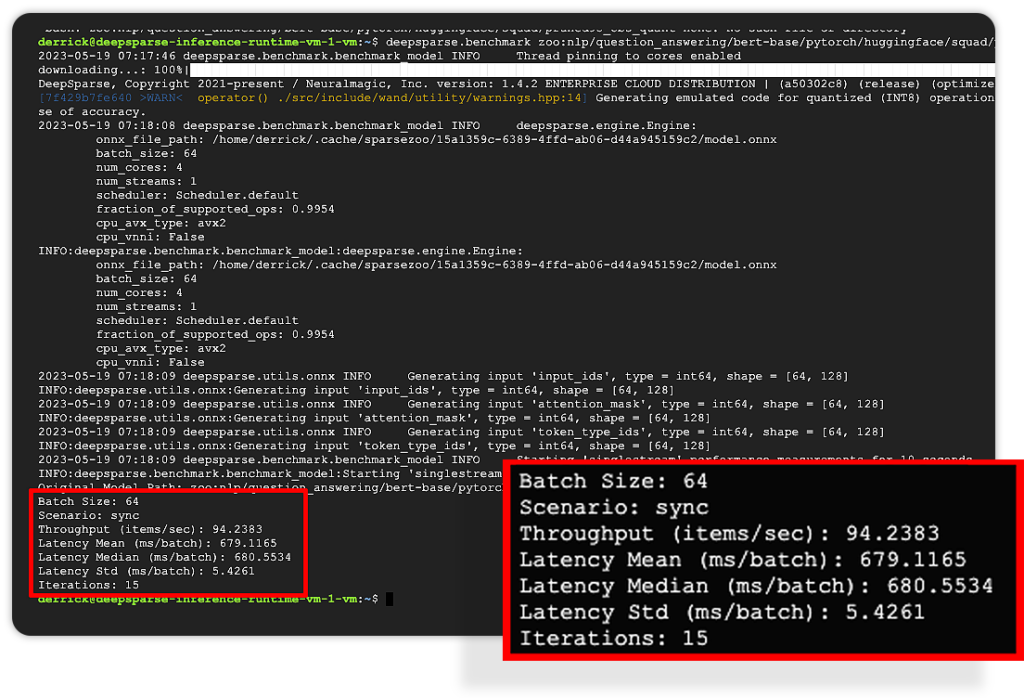
With DeepSparse installed on Google Cloud, you are ready to deploy and benchmark a model.
Here is an example of benchmarking a pruned-quantized version of BERT trained on SQuAD.
Step 6: Run Inference Using DeepSparse
There are two ways to deploy a model using DeepSparse:
- DeepSparse Pipelines are a chain of processing elements that handle pre-processing your input, manage the data flow through the engine, and post-processing the outputs to make interaction simple.
- DeepSparse Server is used to serve your model as a RESTful API. It wraps Pipelines with the FastAPI web framework which makes the deployment process fast, and facilitates integration with other services.
Here is an example of deploying a question-answering system using DeepSparse Pipelines.
from deepsparse import Pipeline

# Downloads sparse BERT model from SparseZoo and compiles with DeepSparse
qa_pipeline = Pipeline.create(
    task="question_answering",
    model_path="zoo:nlp/question_answering/bert-base/pytorch/huggingface/squad/pruned95_obs_quant-none")

# Run inference
prediction = qa_pipeline(
    question="What is my name?",
    context="My name is Snorlax")
print(prediction)
# >> score=19.847949981689453 answer='Snorlax' start=11 end=18
Here is an example of deploying a question-answering system using DeepSparse Pipelines.
loggers:
  python:

endpoints:
  - task: question_answering
    model: zoo:nlp/question_answering/bert-base/pytorch/huggingface/squad/pruned95_obs_quant-none
Download this config file on the VM and save it as qa_server_config.yaml.
curl https://raw.githubusercontent.com/neuralmagic/deepsparse/main/examples/gcp-example/qa_server_config.yaml > qa_server_config.yamlLaunch the server from the CLI. You should see Uvicorn running at port 5543.
deepsparse.server --config-file qa_server_config.yaml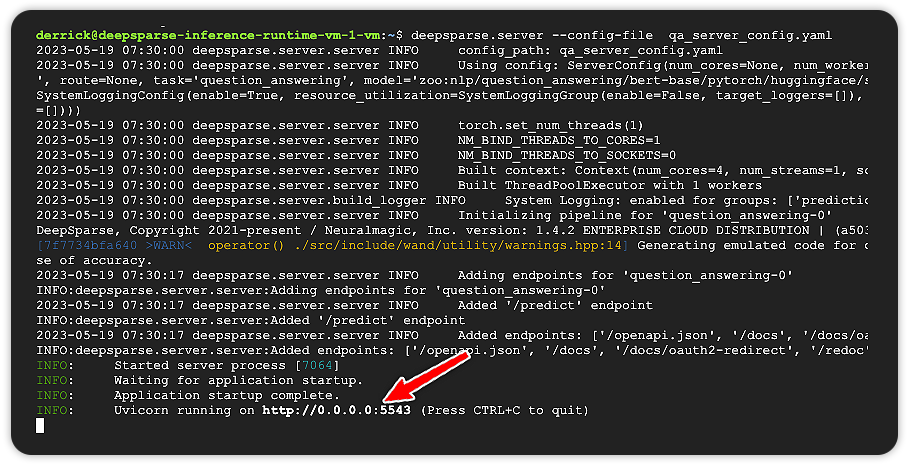
The available endpoints can be viewed by using the docs at http://YOUR_INSTANCE_IP:5543/docs. You can make predictions from the /predict endpoint.
import requests

# fill in your IP address
ip_address = "YOUR_INSTANCE_PUBLIC_IP" # (e.g. 34.68.120.199)
endpoint_url = f"http://{ip_address}:5543/predict"

# question answering request
obj = {
    "question": "Who is Mark?",
    "context": "Mark is batman."
}

# send HTTP request
response = requests.post(endpoint_url, json=obj)
print(response.text)

# >> {"score":17.623973846435547,"answer":"batman","start":8,"end":14}
Next Steps
Now that you have deployed and setup DeepSparse on Google Cloud, you can dive deeper into some of the other computer vision and natural language processing models from Neural Magic's SparseZoo for deployment. We will have a dedicated blog post on this topic, where we dive deeper into the available models along with advanced features, like benchmarking and monitoring. Stay tuned for the second blog of this two-part Google Cloud blog series.
Final Thoughts
We are excited to be a Google Cloud Build Partner and to bring DeepSparse to the Google Cloud Marketplace. We look forward to sharing more examples of DeepSparse running on Google Kubernetes Engine (GKE), Google Cloud Run, and integrating with other Google services. Sign up for our newsletter to stay up to date with all new Neural Magic releases.

